
TL;DR:
- A print-ready file must meet strict standards like PDF/X format, CMYK, 300 DPI, and proper bleed.
- Choosing the right PDF/X standard depends on the print method, with PDF/X-1a for offset and PDF/X-4 for digital presses.
- Common errors include missing bleed, RGB colors, non-embedded fonts, and low-resolution images, which can cause costly delays.
Sending a design file to your printer without checking if it's truly print-ready is one of the fastest ways to burn through your packaging budget. Many CPG founders assume that a polished-looking design file is the same as a production-ready one. It isn't. The gap between a "finished" design and a file your printer can actually use is where costly reprints, color shifts, and blurry logos live. This guide breaks down exactly what print-ready means for packaging, which file standards matter, and how you can get your files right the first time without paying agency rates to do it.
Table of Contents
- What makes a file 'print-ready' for packaging?
- Comparing packaging print standards: PDF/X-1a vs PDF/X-4
- Common mistakes to avoid with print-ready packaging files
- Practical steps for affordable, print-ready packaging concepts
- What most CPG brands get wrong about print-ready files
- Affordable packaging solutions with OffCut
- Frequently asked questions
Key Takeaways
| Point | Details |
|---|---|
| Understand print-ready specs | Follow PDF/X, CMYK, and proper bleed requirements to ensure your packaging prints perfectly. |
| Pick the right PDF/X standard | Match PDF/X-1a or X-4 to your print run method for cost and compatibility benefits. |
| Avoid costly errors | Double-check your files with a checklist or preflight tool to catch common and expensive mistakes. |
| Apply affordable strategies | Use ready-to-go concepts and proven pro tips to create print-ready files without agency fees. |
What makes a file 'print-ready' for packaging?
The term "print-ready" gets thrown around a lot, but for CPG packaging it has a very specific meaning. A print-ready file is one that a printer can take directly to press without needing to fix or adjust anything. No guessing on colors, no missing fonts, no blurry graphics. It's a file built to spec from the start.
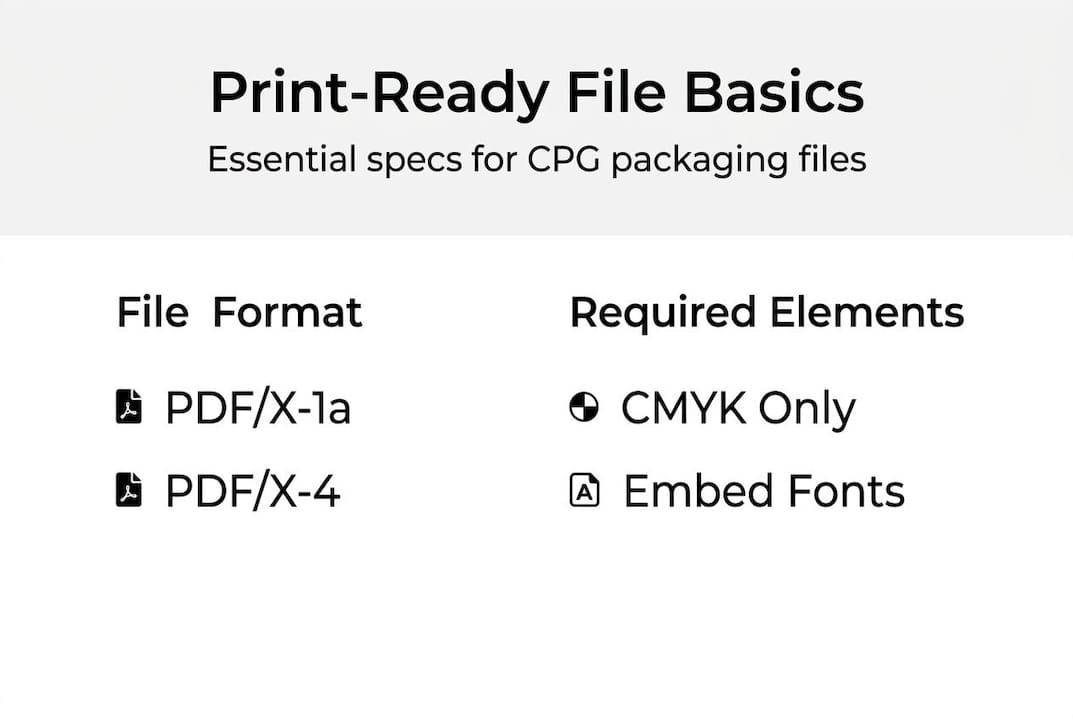
At the core, print-ready files for packaging are typically PDF/X format, such as PDF/X-1a, X-3, or X-4, ensuring embedded fonts, CMYK colors, no transparency issues, high-resolution images at 300 DPI minimum, and proper bleed. Each of those requirements exists for a practical reason. CMYK (Cyan, Magenta, Yellow, Key/Black) is the color system physical printers use. RGB is for screens. If you send an RGB file to print, your vibrant brand colors will shift in ways that are hard to predict and expensive to fix.
Bleed refers to artwork that extends beyond the final cut line of your package, typically 0.125 inches on each side. Without bleed, you risk white edges appearing on your finished packaging where the cut wasn't perfectly precise. And with packaging, cuts are never perfectly precise.
Here's a quick reference for the core print-ready specs every CPG packaging file needs:
| Spec | Required standard |
|---|---|
| File format | PDF/X-1a, PDF/X-3, or PDF/X-4 |
| Color mode | CMYK only |
| Image resolution | 300 DPI minimum |
| Bleed | 0.125 in (3mm) on all sides |
| Fonts | Fully embedded or outlined |
| Transparency | Flattened (for PDF/X-1a) |
The print-ready essentials that most brands miss are font embedding and bleed setup. Fonts that aren't embedded will be substituted by your printer's system, often with completely different typefaces. The official PDF/X FAQ from the Ghent Workgroup is one of the most reliable technical references for understanding these standards in depth.
For packaging specifically, you also need to understand dielines for packaging, which are the structural cut and fold lines your artwork must align with. A file without a proper dieline is like a map without roads.
Pro Tip: Always embed or outline your fonts before exporting your final file. Even if your printer uses the same font, version differences between software can cause unexpected text reflow or substitution.
Comparing packaging print standards: PDF/X-1a vs PDF/X-4
With the basics clear, let's look closer at the most common file standards you'll choose between and why their differences matter for CPG packaging runs.
Not all PDF/X formats are created equal. PDF/X-1a is CMYK-only with flattened transparency, making it highly compatible for traditional offset printing, while PDF/X-4 supports transparency and layers and works best for modern digital presses. Choosing the wrong one for your print method can introduce errors that don't show up until your run is already done.
Here's how the two most common standards compare for CPG packaging:
| Feature | PDF/X-1a | PDF/X-4 |
|---|---|---|
| Color support | CMYK only | CMYK + spot colors |
| Transparency | Flattened | Supported natively |
| Layers | Not supported | Supported |
| Press compatibility | Traditional offset, flexo | Modern digital presses |
| File complexity | Lower | Higher |
| Best for | High-volume runs | Short-run digital printing |
For most early-stage CPG brands doing short runs to test market fit, PDF/X-4 paired with a digital press gives you more design flexibility and faster turnaround. For high-volume flexographic printing, which is common for flexible packaging like pouches and labels, PDF/X-1a remains the safer and more universally accepted choice.
Here's something worth keeping in mind:
Short CPG runs suit digital printing well, but watch for scaling limits. What works at 500 units on a digital press may need a full file rebuild when you move to 50,000 units on a flexo line.
Using vector graphics in print files is one of the best ways to future-proof your artwork across both standards. Vectors scale without any quality loss, meaning your logo looks just as sharp on a 2-inch label as it does on a 12-inch shipping box.
Key considerations when choosing your PDF/X standard:
- Press type: Confirm with your printer whether they run offset, flexo, or digital before finalizing your format.
- Design complexity: If your packaging uses drop shadows, gradients, or layered effects, PDF/X-4 handles these more cleanly.
- Timeline: PDF/X-1a files are simpler and often process faster through older prepress systems.
- Budget: Digital printing with PDF/X-4 tends to be more cost-effective for small runs under 1,000 units.
Common mistakes to avoid with print-ready packaging files
Choosing a standard is just the start. Here are the real-world mistakes that sabotage affordable packaging, plus practical tips you can apply immediately.
Even experienced brand managers make file errors that delay production. The good news is that most of these mistakes are completely preventable once you know what to look for. Error costs are consistent across print types, and short runs suit digital printing for affordable CPG prototyping, which means catching errors early on a small batch saves you far more than the cost of a preflight check.
The most common mistakes CPG brands make with packaging files:
- Missing bleed: Artwork stops at the trim line, leaving white edges after cutting.
- RGB color mode: Colors look great on screen but shift dramatically when printed in CMYK.
- Non-embedded fonts: Printer systems substitute fonts, breaking your brand typography.
- Low-resolution images: Anything below 300 DPI prints blurry, especially on matte or uncoated stock.
- Incorrect color profiles: Using the wrong ICC profile leads to unexpected color output.
- Spot colors not defined: Pantone colors left undefined get converted to CMYK approximations.
Before you send any file to print, run through this sequential checklist:
- Confirm file format is PDF/X-1a or PDF/X-4 as required by your printer.
- Check that all images are 300 DPI or higher at final print size.
- Verify color mode is CMYK throughout, with no RGB or Lab color objects.
- Confirm bleed is set to at least 0.125 inches on all sides.
- Check that all fonts are embedded or outlined.
- Review spot colors and confirm Pantone references are correct.
- Run a preflight check using your design software or a dedicated tool.
Learning from packaging mistakes to avoid before your first print run is far cheaper than discovering them after. Building a consistent packaging workflow that includes a preflight step every single time is the single best habit you can build.
Pro Tip: Use the free preflight tools built into Adobe Acrobat or Illustrator before sending any file. They catch the majority of common errors in under two minutes.
Practical steps for affordable, print-ready packaging concepts
To move from theory to action, here's how you can directly upgrade your brand's packaging output affordably and efficiently.
You don't need a full-service agency to get print-ready packaging files. What you need is a clear process and the right starting point. Short runs suit digital printing for affordable CPG prototyping, which means you can test real packaging at low cost before committing to large volumes.
Follow these steps to go from concept to print-ready file without agency overhead:
- Source a concept built for print. Start with a design that already follows packaging specs. Affordable packaging design ideas built on proper dielines save you hours of rework.
- Confirm your printer's requirements. Every printer has slightly different specs. Ask for their print spec sheet before you finalize anything. This one step eliminates most file rejection issues.
- Set up your file correctly from the start. Use CMYK color mode, set bleed in your document settings, and work at 300 DPI from day one. Retrofitting these settings later is messy and error-prone.
- Apply your brand assets to the template. Swap in your logo, colors, and copy. Keep all brand elements within the safe zone, which is typically 0.125 inches inside the trim line.
- Run a preflight check. Use Acrobat's built-in preflight or a tool like Enfocus PitStop to catch any remaining errors.
- Export as the correct PDF/X format. Match the format to your printer's press type. When in doubt, ask.
- Request a physical proof. Before approving a full run, always request a hard proof. Screen colors and print colors are never identical.
Knowing how sourcing packaging design works at different price points helps you make smarter decisions about where to invest your budget. Starting from a print-ready concept rather than a blank canvas cuts your timeline significantly.
Pro Tip: Look for sources that provide dieline templates alongside the design files. A dieline built into your starting file means one less thing to align manually before print.
What most CPG brands get wrong about print-ready files
Here's a reality check from the Offcut team. Most of the brands we see struggling with print-ready files aren't struggling because of technical ignorance. They're struggling because someone told them that perfection is the goal. It isn't. Accuracy is the goal.
Founders spend hours obsessing over subtle color gradients and font kerning while completely missing a missing bleed or an RGB image buried in the file. Those aesthetic details won't matter if the file gets rejected at prepress. The brands that ship fastest focus on specs first, aesthetics second.
There's also a persistent myth that print-ready files require expensive software or a professional designer to produce. They don't. What they require is a checklist and discipline. A founder who follows a clear spec sheet consistently will outperform a designer who eyeballs it every time.
Our honest take: for early-stage brands, a "good enough to ship" file that meets all technical specs beats a beautiful file that fails preflight. Use the guide to print-ready essentials as your baseline, nail the specs, and iterate on aesthetics once you're in market.
Affordable packaging solutions with OffCut
If this guide has you ready to upgrade your packaging without hefty agency costs, here's how Offcut makes your next step seamless.
Offcut exists specifically for CPG founders and brand managers who need great packaging without the agency price tag. Every concept on the platform is built by professional designers and comes ready to adapt for print, so you're not starting from scratch or hoping a generic template meets spec.
Browse affordable packaging concepts from designers who know CPG packaging inside and out. Each file is built with real production in mind, not just screen appeal. Whether you're launching your first SKU or refreshing an existing line, the OffCut platform gives you a faster, more affordable path to print-ready packaging that actually works on press.
Frequently asked questions
What is a print-ready file for CPG packaging?
A print-ready file for CPG packaging is typically a PDF/X with embedded fonts, CMYK color, bleeds, no transparencies, and high-resolution images set up for direct manufacturing use. It's a file a printer can take straight to press without any corrections.
Which PDF/X standard should I use for my packaging?
Use PDF/X-1a for most traditional offset print jobs. PDF/X-4 supports transparency and layers, making it ideal for modern digital printing and designs with complex visual effects.
How can I check if my file is print-ready before submitting?
Run a preflight check using Adobe Acrobat or Illustrator to verify color mode, bleed, resolution, fonts, and file format. Consistent error costs across print types make this two-minute step one of the highest-value habits you can build.
What happens if my packaging file isn't print-ready?
You'll face production errors, delays, or reprints that waste both time and budget. Error costs are consistent regardless of run size, and catching issues before press is always cheaper than fixing them after.