
Most packaging professionals have seen die-cutting reduced to a footnote in production conversations, treated like a commodity step rather than a strategic lever. That's a costly misconception. Die-cutting is a precision manufacturing process using metal dies to create custom packaging shapes with repeatable accuracy. It drives brand differentiation, reduces material waste, and unlocks structural features that off-the-shelf boxes simply cannot deliver. This guide walks you through every layer of die-cutting: what it is, how it works, which method fits your run, and how to troubleshoot the problems that quietly drain your production budget.
Table of Contents
- Die-cutting defined: The foundation of modern packaging
- How the die-cutting process works: Step-by-step
- Flatbed vs rotary vs digital: Selecting the right die-cutting method
- Core functions of die-cutting: Features that shape packaging
- Cost and efficiency: Maximizing ROI in die-cutting
- Troubleshooting die-cutting: Common failures and solutions
- Pro tips for packaging success with die-cutting
- Accelerate packaging innovation with Offcut
- Frequently asked questions
Key Takeaways
| Point | Details |
|---|---|
| Versatile packaging tool | Die-cutting enables efficient, impactful packaging across diverse materials and shapes. |
| Method matters | Choosing the right die-cutting method depends on run length, material type, and design goals. |
| Efficiency boosts ROI | Optimizing dielines, nesting, and method selection reduces cost-per-piece and production waste. |
| Prevent failures | Regular maintenance, proper calibration, and careful design prevent common die-cutting issues. |
Die-cutting defined: The foundation of modern packaging
Die-cutting is not just about cutting cardboard into squares. It's the process that gives packaging its personality. Die-cutting uses specialized metal dies to cut, crease, or form packaging materials into precise, repeatable shapes. That means window cut-outs, self-locking tuck boxes, foldable retail displays, and curved silhouettes that make a product impossible to ignore on shelf.
The materials it handles are broad: paperboard, cardboard, corrugated board, and various plastics all respond well to die-cutting. This versatility is why packaging comprises 40% of die-cut products across all industries. No other single process touches so many packaging formats.
Here's a quick look at common packaging applications and the materials they use:
| Application | Common material | Die-cutting benefit |
|---|---|---|
| Retail tuck boxes | Paperboard | Clean folds, precise tabs |
| Corrugated shippers | Corrugated board | Structural integrity |
| Window cartons | Paperboard + film | Custom aperture shapes |
| Blister backing cards | Chipboard | Kiss-cut adhesive zones |
| Flexible pouches | Plastic film | Shaped edges, hang holes |
Beyond structure, die-cutting is a direct investment in packaging appeal and cost control. A well-designed die reduces material use, speeds up assembly, and creates a shelf presence that generic packaging cannot match.
"The die is not just a cutting tool. It is the physical translation of your brand's structural identity."
How the die-cutting process works: Step-by-step
Understanding the workflow helps you catch problems before they hit the press. The die-cutting process starts with CAD dielines, moves through die fabrication and machine setup, then into material feeding, cutting, and finishing. Each stage has its own failure points and optimization opportunities.
Here is the full sequence:
- Dieline design — A CAD file defines every cut, crease, and perforation. Nesting efficiency is built in here to minimize sheet waste.
- Die fabrication — Steel rule or rotary dies are manufactured to match the dieline exactly.
- Machine setup — Platens, pressure, and registration are calibrated for the specific material and job.
- Material feeding — Sheets or rolls are fed into the machine with consistent tension and alignment.
- Cutting and creasing — The die strikes or rolls through the material, creating cuts and fold lines simultaneously.
- Waste removal — Stripping pins or vacuum systems pull away the skeleton material.
- Finishing — Inline or offline folding, gluing, and inspection complete the run.
CAD tools are critical at step one. Proper nesting, which means arranging shapes on a sheet to minimize offcuts, can reduce material waste by 10 to 20 percent on complex shapes. Reviewing print-ready design essentials before sending files to production prevents costly rework. If you are building a packaging workflow from scratch, a solid step-by-step packaging design process ensures your dieline is production-ready before tooling is ever cut.
Pro Tip: Always request a sample cut on your actual substrate before approving a full run. Material thickness variations between suppliers can shift crease placement by up to 1mm, which is enough to cause tab misalignment at scale.
Inline finishing options, where folding and gluing happen in the same pass as cutting, dramatically reduce handling time on high-volume jobs. Understanding the full range of die-cutting functions helps you spec the right setup from the start.
Flatbed vs rotary vs digital: Selecting the right die-cutting method
Choosing the wrong method for your run length or material is one of the fastest ways to blow a packaging budget. Each method has a clear sweet spot.
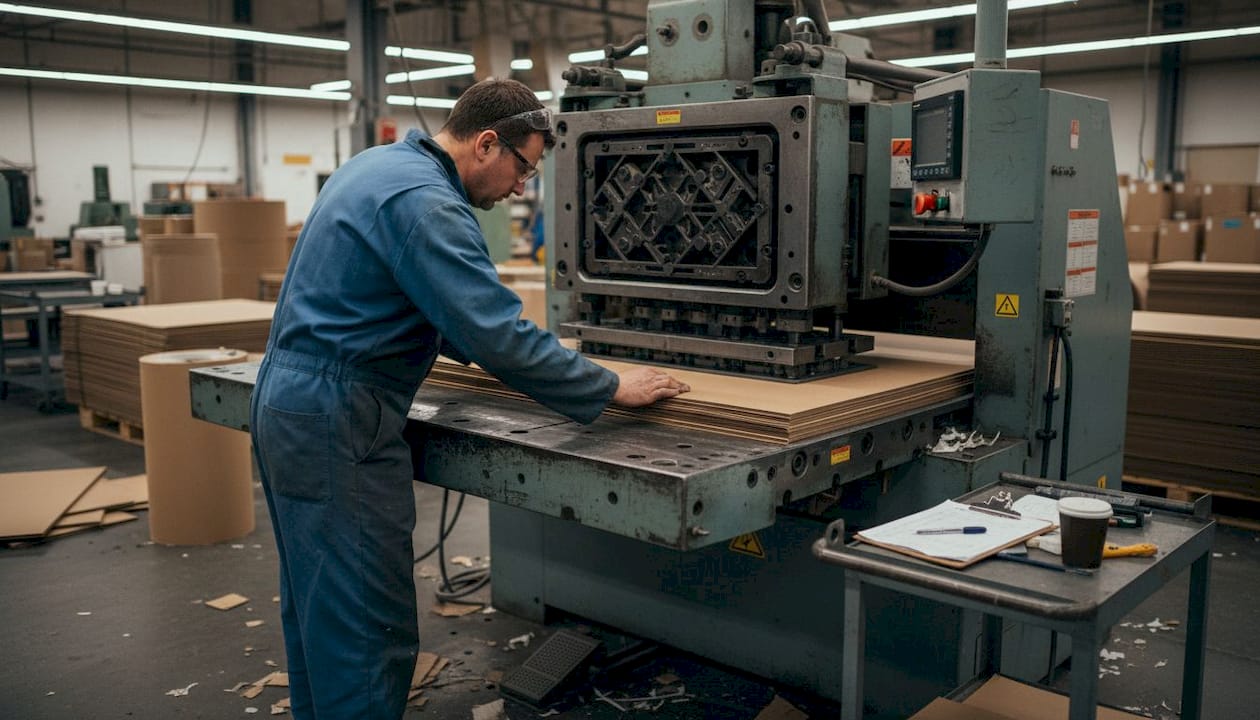
Flatbed die-cutting uses a flat platen that presses a steel rule die into the material. It handles thick substrates well and is the go-to for short-to-medium runs on thick materials. Setup takes 45 to 60 minutes, but the tooling is affordable and the format flexibility is excellent.
Rotary die-cutting uses a cylindrical die that rolls continuously through the material. It reaches speeds up to 1,000 feet per minute, making it ideal for labels, folding cartons, and any high-volume continuous run. The tradeoff is higher tooling cost and less flexibility for shape changes.
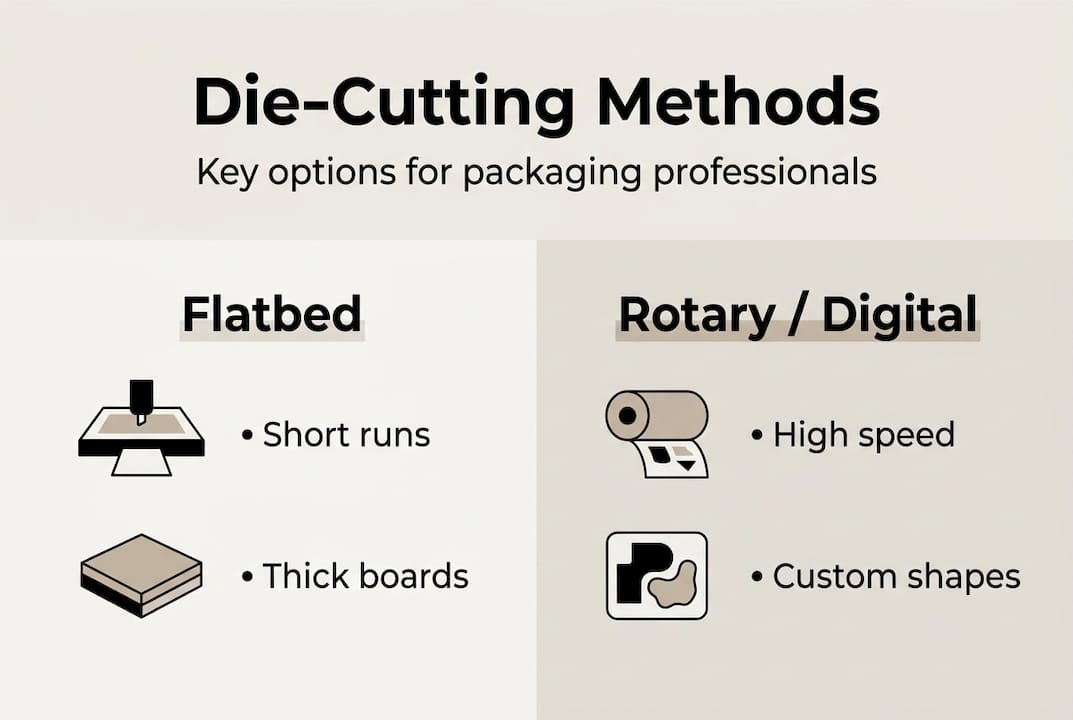
Digital and laser die-cutting requires no physical die at all. A laser or blade follows a digital path, making it perfect for prototypes, short runs, and intricate designs that would be prohibitively expensive to tool in steel.
| Method | Best for | Speed | Tooling cost | Material range |
|---|---|---|---|---|
| Flatbed | Short-medium runs, thick stock | Moderate | Low-medium | Wide |
| Rotary | High-volume, labels, cartons | Very high | High | Medium |
| Digital/laser | Prototypes, intricate, low volume | Low-medium | None | Wide |
Key considerations when selecting a method:
- Run length is the primary driver. Under 5,000 units, digital often wins on total cost.
- Material thickness rules out rotary for heavy corrugated in most cases.
- Shape complexity favors laser for curves and fine detail that steel rule struggles to hold.
- Lead time matters. Digital cuts same-day; steel rule tooling takes 3 to 5 business days.
Understanding the designer's role in packaging concept creation helps align structural decisions with the right production method from day one.
Pro Tip: For new product launches, run your first 500 to 1,000 units digitally. You will almost always find a structural tweak worth making before committing to steel tooling.
Core functions of die-cutting: Features that shape packaging
Die-cutting is not a single action. It is a toolkit of functions, each enabling a different structural or functional feature in your packaging.
Core die-cutting functions include through-cutting, kiss-cutting, scoring, perforating, blanking, and drawing or forming. Here is what each one delivers:
- Through-cutting — Cuts completely through the material. Used for outer shapes, windows, and handle holes.
- Kiss-cutting — Cuts through the top layer only, leaving the liner intact. Essential for peel-and-stick labels and adhesive patches.
- Scoring — Compresses the material along a line to create a clean, controlled fold. Critical for tuck boxes and carton flaps.
- Perforating — Creates a line of small cuts for easy tearing. Used for coupons, tear strips, and resealable features.
- Blanking — Punches out a shape entirely from a sheet. Common in label production and insert manufacturing.
- Drawing and forming — Shapes material into three-dimensional forms. Used for blister packs and molded inserts.
The combination of these functions in a single die pass is what enables pop-up effects, self-locking tabs, and custom-shaped windows. These are the features that turn a plain box into a cost-effective packaging design that communicates brand value without adding assembly steps.
Cost and efficiency: Maximizing ROI in die-cutting
Die-cutting costs break down into two buckets: setup and per-piece. Getting the balance right depends entirely on your run length and method choice.
Rotary speeds reach up to 1,000 ft/min, while flatbed setup runs 45 to 60 minutes per job. Steel rule tooling is significantly cheaper than rotary cylinder tooling, which makes flatbed the smarter entry point for most custom packaging projects. Cost per piece drops sharply with volume, which is why cost efficiency scales with volume and high setup costs become negligible at scale.
| Run size | Recommended method | Approx. tooling cost | Cost per piece trend |
|---|---|---|---|
| Under 1,000 units | Digital/laser | None | Higher |
| 1,000 to 10,000 units | Flatbed | Low-medium | Moderate |
| Over 10,000 units | Rotary | High | Low |
"The biggest efficiency gain in die-cutting is not faster machines. It is smarter dieline design that reduces scrap before the job even starts."
Efficiency strategies that move the needle:
- Nesting optimization — Arrange shapes to maximize sheet coverage. Even a 5% improvement in nesting can save thousands of dollars on long runs.
- Method matching — Never run a 500-unit job on a rotary press. Setup cost alone will destroy your margin.
- Inline finishing — Combining cutting and gluing in one pass cuts handling time and labor cost significantly.
Tracking die-cutting costs as part of your broader packaging lifecycle gives you a clearer picture of where efficiency gains compound over time.
Troubleshooting die-cutting: Common failures and solutions
Even well-run operations hit problems. Knowing the cause before the symptom saves you a full production run.
Common die-cutting failures include uneven cuts, misalignment, excessive creasing, and high scrap rates. Here is how to address each:
- Uneven cuts — Usually caused by dull blades or uneven platen pressure. Inspect and rotate blades regularly; recalibrate pressure across the platen.
- Misalignment — Registration drift from worn feed grippers or inconsistent sheet tension. Check gripper condition and re-register after every 2,000 sheets on long runs.
- Excessive creasing — Too much scoring pressure or incorrect rule height for the substrate. Adjust rule height to match caliper and reduce pressure incrementally.
- High scrap rates — Often a dieline problem, not a machine problem. Review nesting and check that cut lines are not too close to fold lines.
- Blade breakage — Caused by running the wrong blade type for the material. Match blade profile to substrate density.
- Humidity-related failures — Paperboard absorbs moisture and changes caliper. Maintain blades, control humidity, and store substrates flat in climate-controlled areas.
Pro Tip: Build a simple maintenance log for each die. Track how many impressions each die has run. Most steel rule dies are rated for 250,000 to 500,000 impressions. Running past that threshold without inspection is the single most common cause of quality failures.
Addressing these issues proactively also helps you avoid the broader packaging design mistakes that compound into expensive reprints and missed launch windows.
Pro tips for packaging success with die-cutting
These are the habits that separate packaging operations that run smoothly from those that constantly firefight.
- Optimize dielines before tooling — Every hour spent refining a dieline saves three hours of press-side troubleshooting.
- Schedule preventive maintenance — Regular maintenance, humidity control, and pressure calibration are the three levers that keep yields high and downtime low.
- Integrate design and production teams early — Structural decisions made in isolation by designers often create tooling problems that only show up at press time.
- Prefer inline finishing when volume justifies it — Combining die-cutting with printing and gluing in one pass reduces touchpoints and improves registration consistency.
- Stay current with digital and hybrid technology — Digital die-cutting is evolving fast. Hybrid machines that switch between digital and steel rule in the same job are already in production environments.
Pro Tip: When briefing a designer on a new packaging structure, share the production method and run length upfront. A design optimized for flatbed production looks very different from one built for rotary. Aligning early prevents expensive structural revisions. Explore packaging design tips that factor in production realities from the first sketch.
Accelerate packaging innovation with Offcut
Die-cutting rewards great structural design. The problem is that great structural design is expensive to commission from scratch every time. That's where Offcut changes the equation.

Offcut is a marketplace where professional packaging designers list concepts that were created for real briefs but never made it to production. Founders and brand teams get access to unused packaging concepts that are already print-ready and structurally sound, at a fraction of what a custom agency brief would cost. Whether you are sourcing a tuck box concept optimized for flatbed production or a retail-ready carton designed for high-volume rotary runs, the packaging design resources on Offcut are built by people who understand the production side. You skip the blank-page phase and go straight to refinement.
Frequently asked questions
What materials can be die-cut for packaging?
Common materials include paperboard, cardboard, corrugated board, and various plastics. The right choice depends on the structural requirements, print method, and end-use environment of the packaging.
How do I choose between flatbed, rotary, and laser die-cutting?
Pick flatbed for short-to-medium runs on thick materials, rotary for high-speed long runs on labels and cartons, and laser for prototype or intricate work where tooling cost would be prohibitive.
What are the hidden costs in die-cutting?
Initial tooling and setup are the big upfront costs, but cost efficiency scales with volume and poor nesting or mismatched method selection quietly inflate cost per piece across the entire run.
What typical problems occur in die-cutting and how are they fixed?
Uneven cuts, misalignment, and excessive creasing are the most common failures. They are addressed through regular blade maintenance, machine calibration, and dieline optimization before the job goes to press.